2015....Sewing Plans

Wednesday, December 31, 2014

in
When you feel like you haven't accomplished much during a year (sewing-wise), make a collage like these....


When I look back at 2014, I see some definite trends.  I added bag-making to my repertoire.  Surprisingly, I'm actually enjoying it.  I'm using patterns mostly from Swoon Patterns.  There's a very active Facebook group associated with this pattern designer, and it certainly makes it more fun to join in.

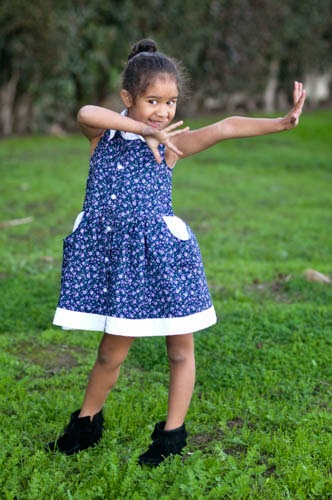
Of course, my Oliver + S sewing continues to dominate.  It really helps when you can buy a pattern, and sew it up in your best fabric and be sure it will go together well, and fit the way it's supposed to.  Unfortunately, I made a bunch of the same patterns over and over again.  Which leads to my resolutions.

I am joining in with a bunch of other folks at Sew Not Perfect in their goal to "Sew Your Pattern Stash 2015".  There are monthly themes, which will kind of force me to make some of these lingering (in my head) projects that haven't been done.  For example, month 1 is "Women".  Why, when I have no clothes barely, do I not sew for myself?  There's a ton of excuses - big people clothes use up way more fabric than little people clothes, I'm not comfortable with fitting myself, etc. etc.  Mostly, for work, I wear jeans, construction work boots.  I do need some tops - generally, I wear very comfortable knit tops from Target - when they fall apart, I just buy a new round.  I'm pretty darned sure that I can make myself a knit top.  I have the family t-shirt pack from Oliver + S - seriously, why have I not made one of these?  So, that's on my sewing agenda for month 1.

So, without further ado, here's my 2015 grand plan:

1.  Make something on the agenda for "Sew Your Pattern Stash 2015" every month
2.  Try very hard to make a Christmas gift every month
3.  Make a project with my embroidery machine every month
4.  Don't buy the child any clothes

I know I can accomplish #1.  #2 and #3 are more iffy.  #4 should be no problem.  I did buy her some clothes for Christmas, but really for the most part, everything she wears is either a hand-me-down, something I made, or something that someone else gifted her.

If you're interested in joining in the Sew Your Pattern Stash 2015, here's the list of the projects:


Happy New Year to all!!!!!

The Blaverry Clara Dress

Saturday, December 27, 2014

in
Before the craziness of the holidays - yes, it was crazy... - I tested a pattern from a designer that I had never tried out; Blaverry on Etsy.  Her patterns are very sleek looking - I definitely was intrigued by the excellent photography and modern look.  In fact, I just looked and some of her patterns are 50% off right now....

Anyways, I didn't know how the Clara Twirl Dress was going to turn out, so I used some totally ugly calico I had in my stash - why I had this I have no clue - but I eked out the dress out of about a yard and a half.

This dress has some very nice details - a collar with a collar stand, a bound neck edge, bound arm seams, and unique side pockets.  The front buttonhole placket is narrow, and you use small buttons; I really like this look.


This is a size 4 on Julia - sewn with no modifications.  I think I need to use 5 length in the bodice, and maybe 6 length in the skirt.  I want to make this dress again, and use fabric I actually like.  It gets a thumbs up from the kid....except, when she initially put it on, she was pulling at the collar.  She's a kid who hates things touching her neck.  But, after we walked around the block for pictures, she forgot about it.  So, I think it will work for her.

Notice we actually have green grass....that's what some rain will do for you in Southern California!  We're in the midst of a long drought, and for months and months, everyone's grass has been brown.  You get strange looks from your neighbors if you waste water.  So, the recent rain has been very welcome.


Thanks for reading - hope your holiday was as fun/crazy as ours!

Oliver + S School Days Jacket - Done!

Sunday, November 16, 2014

in
So, after completing my post for the sew-a-long on the Oliver + S blog, the incomplete jacket sat on my sewing table for days and days, taunting me....

In between, we had two birthdays, complete with birthday celebrations at home, soccer, and school.  And, you know, life.

But, I persevered.

After all my research, poring through posts after posts on the Oliver + S forums, I realized there were many decisions/tinkerings to be made.  My final jacket is complete and here's the decisions I made:

  • added interfacing (Pellon SF101) to the facings
  • used pre-made toggle closures
  • used magnetic snaps inside
  • used quilting cotton for lining the hood and sleeves (designed by Liesl Gibson from my shop with a layer of Thinsulate (purchased from Amazon)
  • used a fairly heavy corduroy for the main body
  • used Polartec 100 for lining the body purchased here
And the final result:

 I absolutely love this jacket.  It's not a tough sew, and obviously the Oliver + S instructions are perfect.  There's a lot of steps, but they're all totally logical.  The jacket went together perfectly. 

This is a size 5 on my newly-turned-5-year-old:


I did think I was getting something by her, as I kept trying it on her while I was sewing and she didn't say anything.....but, when the jacket was complete, she said to me "you know I hate brown, right?"....ugh!  She does love the salmon-y color interior, so I'm hoping she'll wear it.

Then, since there was the lovely fleece still sitting on my sewing table, I whipped up a super-cute, very successful (per the child) outfit:


These are the Oliver + S Playtime leggings in a size 4 with about 3 inches added to the length.  A seriously perfect fit.  I used some Modern Workshop interlock knit from the shop - a great weight for leggings.  I love that the waist on these leggings is not high, nor too gathered.  The top is the Oliver + S Field Trip Raglan shirt made from the same Polartec 100 that I use to line the jacket.  I used a size 7 because of the weight of the fabric, actually with no modifications.  I added a hood, kangaroo pocket and bottom waistband and wristbands from self fabric.  The hood is lined with the Modern Workshop interlock.

I'm so happy with the result of my most recent sewing - really, this is why I sew.  I feel so accomplished when I create something.  Especially when the kid loves it too!

Halloween 2014 - The Decision

Thursday, October 23, 2014

in
We put a lot of thought/discussion into Halloween costumes.  Maybe too much.

There's the whole philosophical discussion to be had - don't look like everyone else, be your own person.  Then there's the realistic - I can't make you into a spaceship that actually flies.  Then, of course, comes the part where I have to convince my kid not to be Elsa....

This year, Julia has been watching a lot more "educational" TV.  Well, educational plus episodes of The Brady Bunch.  So, she decided that she wanted to be Miss Frizzle from The Magic School Bus.  One good look at what Miss Frizzle wears and I was 100% on board.

Seriously, anyone who follows my sewing knows how much I love the Oliver + S Jump Rope Dress.  Isn't that exactly what The Frizz is wearing?


I added a circle skirt to the Jump Rope dress using pattern pieces from another pattern (Tinny Dress by Straightgrain).  The Jump Rope dress is a size 4, and the Tinny Dress pieces were a size 5.  I eyeballed the waist measurement of the bodice and lopped an inch off each side piece of the circle skirt; fit perfectly!  I will be definitely adding a circle skirt to the Jump Rope dress again....nothing makes my child happier than a circle skirt!

I toyed with the idea of printing the fabric on Spoonflower.  A good idea, but a bit expensive.  Then, my next idea was to make felt appliques of the various science stuff.  Seriously time consuming.  Freezer paper stencil?  Time consuming, and I'm not great at it.  Then, I remembered that I had bought some fabric transfer paper and had never used it.  Hmmmm.....

I used Avery 3271 Light Fabric Transfers.  I used a couple of old white t-shirts, and found some free clipart all over the internet for the various transfers; a beaker, a rocket, the sun, etc.  I sized all the pictures to be approximately in the 3-4" area so that I didn't have to applique teeny designs.  I applied the transfers to the t-shirt per the instructions, held my breath, and pulled off the paper - it worked PERFECTLY!  I was delighted.

I then used applique scissors to carefully cut out the fabric around the edge of the design.  Then, I used black thread and machine stitched all the designs onto the pattern pieces.  I have to admit, it took a while.  But, I did it over a few days, so it wasn't that painful.


To complete the outfit, I made her a trick-or-treat bag from a free pattern from Swoon Patterns - the Ethel Tote Bag.  I added a couple of inches to the width so it will be able to hold all the Halloween candy!  I used the same transfer technique to add the Magic School Bus graphic.


Halloween outfit complete - and one happy child!!

A Liberty Avery Dress

Monday, October 6, 2014

in
So, sew-a-longs.  I think I like them.

This is the third sew-a-long I have participated in.  The first was for a Japanese pattern that I had been wanting to sew, the second was for a Modkid bag that I wanted to try, and now, a sew-a-long for a dress pattern that I meant to get when it was released originally - The Avery Dress from Modkid.

A drop waist - yes, please.  Seemed pretty simple.  So, I bought the pattern and joined in.  But, for some reason, I couldn't choose fabric....

Then, I remembered the lovely Liberty of London lawn that my oldest son brought me back from his Europe trip last summer....and, being daring, I cut into the Liberty...

Here's the result:


Enough pictures??!!

The dress has a lined bodice, and a bunch of options - sleeveless, long sleeves, or these super-cute puff short sleeves.  Knowing my child, I made sure that the elastic was very, very loose or she would never wear them.  There's also a cute little pocket which I intended to add, but I lost it and didn't find it until the dress was put together.....next time....because there will surely be a next time for this pattern!

Isabella Dress

Friday, September 12, 2014

in
My daughter loves nothing more than a good pink dress.  That spins.  With no sleeves.  So, here you go - a new pattern from Ollie & Annie.  You can find the pattern here.


This is a size 4 with no modifications.  The embroidery, of course, is from Urban Threads.  I can't even look anywhere else for embroidery designs.


The corduroy is a 21 wale corduroy from Westminster from my shop.  It's perfect because she can wear this as a dress (and she already has) and once the weather cools down, she can wear it with a red long sleeved shirt underneath.


A Very Vintage Betty Skirt

in
I'm so happy to be part of the September Showcase part of the Flip This Pattern Series at Frances Suzanne, some of my very favorite sewists/bloggers.  I love the concept this month; showcasing smaller, indie designers.  Very cool idea.

I was lucky enough to sew The Betty Skirt from The Shaffer Sisters.  They describe their skirt as:  "The Betty Skirt is a classic styled skirt inspired after the deep yokes and pleated skirts of the 1920’s. With 4 different styles and 29 sizes you can keep making skirts for years to come."  Seriously, they're right.

First off, I love the drop waist.  My daughter does too.  So, a definite style win.

But, what fabric to use, and what style?

I must admit, it took me forever to decide.  For some reason, I had neon and argyle on the brain.  I couldn't get it sorted out.  I ran my idea by my oldest son's very cool girlfriend, and she politely shook her head.  Ok, so, a different direction.  (But I may return to the neon/argyle idea.)

Well - I actually like going to estate sales.  You know, where people have died, and now they're possessions are getting sold off .  And, the vultures swarm in.  I actually like looking around, and trying to get a sense of who lived there, and what they loved.  Sometimes, I find vintage books, sewing patterns.  And, my daughter likes going with me.  We went to an estate sale in my own neighborhood.  The family was selling off their mother's possessions and was going to sell the house.  The woman was a collector of tiny tea sets, and beautiful dishes.  My daughter, to her delight, got a beautiful doll cradle and a small tea pot and cups.  She asked the people at the sale what was the name of the woman who died and I think they were sincerely touched that anyone cared.  The lady was Dorothy.

Well, Dorothy had two cross-stitched aprons that called my name.  They tied at the waist, were hand stitched, and were almost floor length.  My attempts to find out the age of these put these at perhaps the 1900's.  And, I seriously cut one up.


I really feel like whoever it was that did this stitching may get a kick out of a 4 year old wearing it maybe a hundred years later.  Maybe.


I really felt like it was meant to be; I used the width of the apron, and even though the embroidery didn't match up in the front, I can live with it.

The pattern is great - amazing instructions, and a ton of options.  This is a size 4 with some added length, only because I was using all the embroidery.  This should fit her for the whole school year.  I'm definitely going to make the pleated version.

If you'd like to purchase the skirt pattern, they're generously offering a 25% discount in their Etsy Shop.  

If you'd like to enter the giveaway, here's the info:


a Rafflecopter giveaway

The Hemlock and Magnolia

Sunday, August 31, 2014

in
Have you been looking for a couple of super easy, well put together, perfectly sized, girl approved patterns for your daughter?  Well, you can thank me.  Well, actually, you can thank Heidi at Elegance and Elephants.


Seriously cute.  The Hemlock Top has a great sleeve ruffle detail - easy to insert as it's not "too" ruffly.  You can make it in long sleeve or short sleeve.  For this top, I went into my husband's closet and grabbed one of his multitude of white t-shirts.  I worked with Julia on my first ever freezer paper stencil.  We traced the flower together, I cut it out, and Julia applied the paint.  Part of my on-going plan to engage her in the clothing making process to ensure that she will actually wear the things I made.

 The Magnolia Skirt comes with two options - one for a knit, and one for a woven.  How smart is that?  The knit is a bit wider to allow for even more "spin" - my version is made out of a very nice soft corduroy and even though it's fairly narrow fitting at the waist and through the hips, the bottom flares out - perfect for the girl who likes to spin.  Like mine.

More photos of the kid - seriously get the pattern.  It's releasing later this week.  And, if this isn't cute enough for you, check out some gorgeous photos of Heidi's daughter, and her other September release pattern in her very cool E&E Patterns Fall 2014 Look Book.


Thanks Heidi for letting me test your patterns!